React JS Course
Traditionally, React has been used to build single-page web apps. However, if you insisted on building a React app with multiple pages or routes, the following process had to be done:
- Tell React to render the page according to the route that the user has navigated to.
- To make this possible, React had to go out and fetch the page from a server.
Implementing these steps in code used to be a bit tedious. This is where React Router starts to shine.
React Router library allows us to implement dynamic routing in app.
Also, React router helps to build applications where there is no page refresh happening while loading data so users don't need to wait until the page loads while requesting some information or while updating the webpage.
It's a popular way to build single-page applications in React.
Normally, when we visit any URL, the request goes to the server. Then the server responds with the data which we display on the webpage.
But this takes time and till the response comes, we might see a blank screen or some flash or loading webpage which is not a great user experience as the user has to wait until the page loads.
Instead, using React Router makes the user experience far better where when we visit any URL, the response generation is handled by the client itself so we get faster results and the user doesn't need to wait or see a blank screen till the webpage loads.
React Router library
React Router is a library that can be used on the web as well as native applications.
So there are two libraries - one for the web which is react-router-dom and the other is for native which is react-router-native.
Now we will be exploring all about the react-router-dom library which is used for building web applications in React.
Now lets use the react-router-dom library and develop a sample React JS application.
npm install react-router-dom
How to use react-router-dom library?
To use the react-router-dom library we need to provide a separate route for each component.
So If we have a /about page then we will display the About component and for /contact page, we will display the Contact component.
Let's create Home, About and Contact as functional components inside the index.js file.
To implement routing, react-router-dom provides BrowserRouter and Route components.
Import them at the top of the index.js file like this:
import { BrowserRouter, Route } from "react-router-dom";
Now lets define our routes inside the BrowserRouter component in App.js
import { BrowserRouter, Route } from "react-router-dom";

import Home from "./components/Home";
import About from "./components/About";
import Contact from "./components/Contact";

function App() {
  return (
    <BrowserRouter>
      <Route path="/" component={Home} exact={true} />
      <Route path="/about" component={About} />
      <Route path="/contact" component={Contact} />
    </BrowserRouter>
  );
}

export default App;
The exact is a boolean prop so when we provide exact={true} as a prop to the Route component, it will display that component of the Route, only when the path matches exactly.
Now lets open these routes in browser
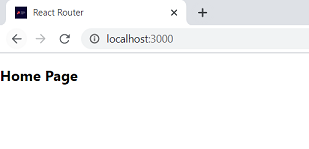
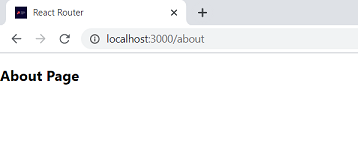
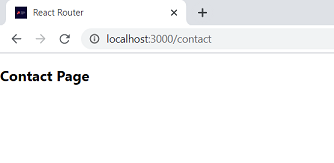
404 page
Now, we're able to correctly render the Home, About and Contact components.
But what If, we access a route that does not exist?
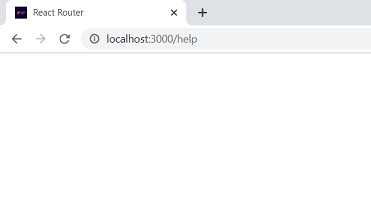
As you can see, when we access the /help route, we get a blank page because such route does not exist and we don't get any error in the console also.
So when there is no matching route available in the BrowserRouter, the React router will display a blank page.
So to fix this, we can add a component to be displayed for an invalid route and include all routes in Switch component.
Add a NotFound component after the Contact component(though the order does not matter) in App.js.
import { BrowserRouter, Route, Switch } from "react-router-dom";

import Home from "./components/Home";
import About from "./components/About";
import Contact from "./components/Contact";
import NotFound from "./components/NotFound";

function App() {
  return (
    <BrowserRouter>
      <Switch>
        <Route path="/" component={Home} exact={true} />
        <Route path="/about" component={About} />
        <Route path="/contact" component={Contact} />
        <Route component={NotFound} />
      </Switch>
    </BrowserRouter>
  );
}

export default App;
So the Switch component will act similar to the switch case with a break statement where it checks for matching route and If there is a matching route, then it will render that corresponding component and it will not check other routes for matching.
And the last NotFound component Route will act as a default case because we have not provided any path for it. If there is no matching route in all the routes mentioned, then the last mentioned route without path will be executed.
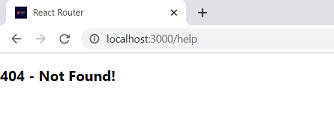
If you try an invalid route now, you will see the NotFound page being displayed.
Adding Navigation
As you have seen, we're directly accessing the /about, /contact routes from the URL but that's not a good user experience.
We can't tell the user to directly access the pages by entering URL. So we need to provide a navigation menu so it's easy for the user to navigate between various pages.
Create a new components folder inside the src folder and add Header.js file inside it with the following content:
const Header = () => {
  return (
    <ul className="navigation-menu">
      <li>
        <a href="/">Home</a>
      </li>
      <li>
        <a href="/about">About</a>
      </li>
      <li>
        <a href="/contact">Contact</a>
      </li>
    </ul>
  );
};

export default Header;
To get this component to be displayed on every route, we need to add the Header component inside the BrowserRouter but outside the Switch component like this:
import { BrowserRouter, Route, Switch } from "react-router-dom";

import Home from "./components/Home";
import About from "./components/About";
import Contact from "./components/Contact";
import NotFound from "./components/NotFound";
import Header from "./components/Header";

function App() {
  return (
    <BrowserRouter>
      <Header />
      <Switch>
        <Route path="/" component={Home} exact={true} />
        <Route path="/about" component={About} />
        <Route path="/contact" component={Contact} />
        <Route component={NotFound} />
      </Switch>
    </BrowserRouter>
  );
}

export default App;
To make the application look good, add the following contents inside the index.css file:
* {
  margin: 0;
  padding: 0;
  box-sizing: border-box;
}

body {
  font-family: "Segoe UI", Tahoma, Geneva, Verdana, sans-serif;
  padding: 1rem;
}

.navigation-menu {
  list-style-type: none;
  margin-bottom: 1rem;
}

.navigation-menu li {
  display: inline-block;
}

.navigation-menu li a {
  padding: 0.5rem;
}
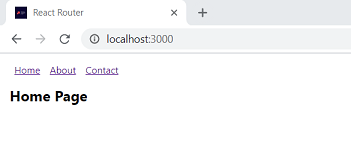
Now you will see the following screen:
Using Link
As you have seen above, the page is completely refreshed when clicked on any of the navigation links so it's not using client-side routing yet.
This is because we're using anchor tag (<a />) for navigation links.
React router provides a Link component to fix this.
Now lets add Link component in Header.js as shown below.
import { Link } from "react-router-dom";
The Link component accepts a to prop where we specify the path like this:
<Link to="/">Home</Link>
So make this change for all of the links in the Header.js file.
import { Link } from "react-router-dom";

const Header = () => {
  return (
    <ul className="navigation-menu">
      <li>
        <Link to="/">Home</Link>
      </li>
      <li>
        <Link to="/about">About</Link>
      </li>
      <li>
        <Link to="/contact">Contact</Link>
      </li>
    </ul>
  );
};

export default Header;
If you check the application now, you will see that, there is no page refresh happening while using the navigation.
This looks more natural now and we get an instant response without a flash of the screen.
The Link component uses HTML5 history API to achieve the client-side routing functionality without a page refresh.
So you get an instant response and is the preferred way to do client-side routing.
Using NavLink
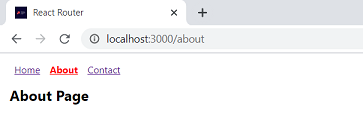
The navigation looks nice but It will be good to highlight a particular link when we're on that page.
So it's easy for the user to identify which page he/she is on If the content of the page is different.
Therefore, React router provides a NavLink component which is similar to Link but it can take an additional activeClassName prop where we specify the name of the CSS class to apply for the link when we're on that page.
So open the index.css file and add the following CSS rule at the end of the file:
.active {
  font-weight: bold;
  color: red;
}
and in the Header.js file, change Link to NavLink in the import statement:
import { NavLink } from "react-router-dom";
The NavLink component is used like this:
<NavLink to="/" activeClassName="active">
  Home
</NavLink>
Make this change for all the links in the file.
So your changed Header.js file will look like this now:
import { NavLink } from "react-router-dom";

const Header = () => {
  return (
    <ul className="navigation-menu">
      <li>
        <NavLink to="/" activeClassName="active" exact={true}>
          Home
        </NavLink>
      </li>
      <li>
        <NavLink to="/about" activeClassName="active">
          About
        </NavLink>
      </li>
      <li>
        <NavLink to="/contact" activeClassName="active">
          Contact
        </NavLink>
      </li>
    </ul>
  );
};

export default Header;
Here, we have given the activeClassName prop to all the links so when we're on that route, the React router will automatically add that class to that link.